

- Valorant vs Apex Compared - January 11, 2023
- Ascent Valorant Guide - September 22, 2022
- Haven Valorant Guide: The Unique Three Site Map! - August 18, 2022
Valorant is a game that is still in a significant development phase. Yet, it has become one of the most prominent esports in the world. Creative thinking and implementation are a big reasons for its huge success.
The game received much praise due to its exciting maps, and Split played a big part in making Valorant so much fun. It has such an intricate design, and players like to play on Split for many reasons. Although the map is not a part of official matchmaking for specific reasons, fans remain hopeful that it will return soon.
Here’s a detailed review of the map: everything is present, from its statistics to architecture.
First, let’s look at its history:
One of the First Maps in the Game
Split has been a part of Valorant since its beginning. It has been a crucial map that provided great opportunities for both teams. Even today, Split is a favorite map for many players because of its beautiful structure and strategic possibilities.
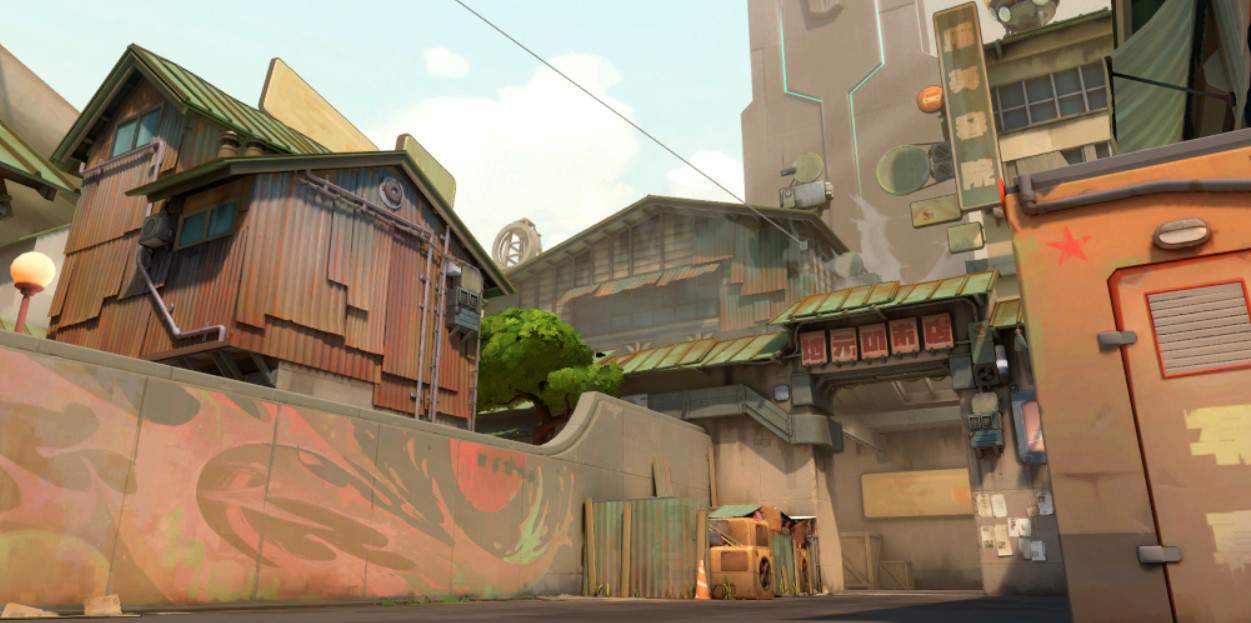
According to lore, Split is set in Tokyo, Japan. During development, it had the codename Bonsai. Split is also where the Kingdom Corporation built its headquarters and central Research lab. The map shows two different settings within a small area. Yoru, the agent from Japan, also has a voice line that talks about the Kingdom Corporation’s motives:
“This neighborhood used to be so much better without this Kingdom shit.”
– Yoru, Match Start on Split
The region close to A site belongs to the Kingdom Corporation, which usurped it. They built a train station, headquarters, and other essential buildings. The Kingdom Corporation has eliminated many of the settlements living close to the B site. The evil forces are bent on taking the rest of the map away from civilization.
There’s also a symbolic value to the map and its name. There are two sides of the city shown in the location, and they both depict a different story. One shows the traditional side of Tokyo, while the other focuses on a capital image. As the two areas have a big difference in representation, the map is split into two sites.
Map Layout and Design Progression
Split is one of the most detailed maps to play in the game. It is a short map with plenty of ways to get around. Bind is the only other map that allows fast navigation through its portals. The map consists of two bomb sites connected through a dense network of pathways through Mid.
A Site
The A site is the Kingdom’s stronghold. The Defender Spawn has two ways to get to the planting area. On the right side is the Tower, which provides a strong position for players who want to watch over the site.
A Tower also has two routes, one that leads to Mid through an ascender and the other to A Ramps and Main. From the Attacker Spawn, the right side leads to A, with an ascender leading to the Sewers nearby.
Right in front of A Main, defenders like to use a small choke point for multiple kills through abilities. The area for planting the spike is quite an exciting zone. It has three different ways: one from the Defender Spawn area, one from the Attacker Spawn through A Main, and players can jump from Tower to get into the site right from the front. The Tower also provides excellent opportunities for players to spot in attacking and defending situations.
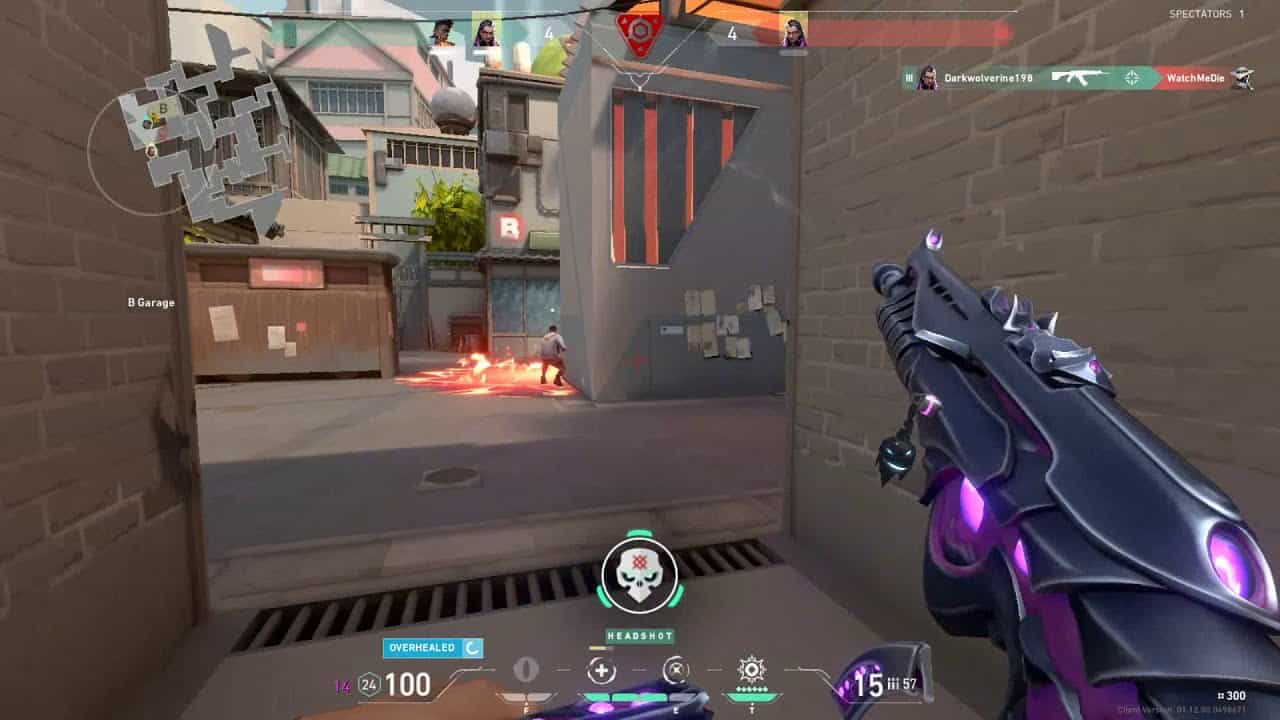
B Site
The B site represents the more deserted area on the map. It also has several vital callouts and locations from which players can gain an advantage. The site has a short metallic box that doesn’t allow bullets to penetrate it. However, it is just about the size of the agent crouched, so only the tip of the head is available for a player to shoot.
Like the A site, it also has a high spot named Heaven that can be advantageous in both situations. An ascender allows players to get to Heaven if they’re in B and need to rotate quickly.
Heaven also has three ways to approach it. One is the ascender in B, while one of them utilizes stairs from Defender Spawn and the third one from Mid. There’s also B-Main leading from the Attacker Spawn. There are plenty of spots here to peek for an effective kill. Another box in the corner allows sneaky plays and camping, which is adequate for both purposes.
A stack at the site entrance from B Main gives players a particular advantage for defending. With proper use, a team can quickly eliminate all enemies if they’re planning to rush.
Right underneath Heaven, there’s also a choke point that can be highly bothersome to players if they don’t check it and an enemy player takes them out. Besides Heaven, the Defender Spawn also has an entry into the B site that opens right into the planting area.
Mid
Mid is a discreet spot. It has four entryways, allowing players time to lurk and create different scenarios.
One of the routes into Mid comes from the Attacker Spawn, right before B Main. Here, an entry into a small room opens into the Mid area with a clear view of the Sewers in front. The A Tower also opens into the Vents, which leads into Mid.
The Vents have a clear view of Mid from the Attacker Spawn area, and the entry to B Heaven is open on the right side. B Heaven also leads to Mid at right, with a small flight of stairs and some space in the corner to camp.
There’s also a box right in front of the opening from B Heaven, giving Sage mains a fundamental task of walling off Mid to prevent entry into both sites from the spot. The Sewers also open out to Mid through an ascender on its entry just before A Main.
Altogether, the Mid is a space that holds the connection between the two towers, sewers, and the spawns in one path. With appropriate planning, teams can use the location to their advantage, get important frags and information, and pressure the enemy with just their utility.
Map Development
Developers had a simple plan for creating Split. Using off-site positions that could give Attackers and Defenders a good position in the game was the main objective behind the map, and they were pretty successful in their final version. The first ideas were quite advantageous to a single team; therefore, the team redesigned them and formed the current Split.
Split’s first version of the layout consisted of a single tower made of bulletproof glass in the center. Developers thought placing the Defenders inside this tower would give them an idea about the Attackers’ plan. However, the concept of a tower remained, but they placed two instead of one.
In the second design, the bomb sites received newer angles to give them a more exciting combat approach. Designing Mid that provided both teams a way into the two towers was also a task that the developing team completed. However, the idea of Defenders overlooking the Attackers went into the bin as the two higher locations received an opening into the sites for an overwatch purpose for the dominant team.
The third layout combined the previous two ideas and established a connection between the towers and the sites so players could use them in combat situations. With an open avenue into the site from the tower, players could then jump out into the site to complete their respective goals. The developers also placed most ascenders to create another route between different locations.
Developers noticed that Mid had one too many routes after the third round of design. The best solution for this problem was to divide Mid into two halves. They also designed Vents and Sewers, two hallways that connected Mid with other essential locations.
Split’s Official Record

In June 2022, Riot Games removed Split from Competitive and Unranked queues. Therefore, Valorbuff has no record of matches played on Split. It hasn’t hosted a single match in the past thirty days, so no information about its statistics is available.
There were plenty of reasons to remove Split from the pool. According to developers, Split had been in the pool since the game’s earliest days. Moreover, they were planning to bring in Pearl, a new map, and expanding the map pool would be tedious for many people.
Therefore, they decided to put Split off the lobbies and keep the number of maps the same with the introduction of Pearl. Developers claim there might be some time before we see Split back in the map pool, and it might even come with some changes.
How to Play on Split
Split can employ both deathmatch skills and planned execution. Split can be an easy win or a nightmare depending on the team’s chemistry. While picking the right team of agents is vital, using their abilities to synergize a plan of attack is also necessary. Following is a simple plan on how to play in different locations in Split:
A Site
Attackers have a fundamental approach to A. Rushing A Main to take control of A Tower is a crucial step. It gives Attackers substantial control of Mid and A Site itself. They can push through A Main after smoking off Screens. Meanwhile, a teammate can gain control of Mid from B Main, taking out an enemy flanking from B Heaven through Vents.
After planting the spike, it’s easy to hold angles from either Rope in A Tower, Elbow, Middle, or Back Site. Most of the enemies will be pushing through Defender Spawn, so it will be an easy spot to cover for the player in A Tower.
You can also rush Mid to take control of Vents, and then a teammate can lurk up to A Ramps and clear out A Tower for the team to enter the site and build up from Mid to the entire A site.
Defending is a tedious process in A. I think three players are necessary for A: one should play from Screens or Elbow, another should be up in Tower, and the third player can switch positions every round as support.
Smokes and Incendiary can help keep enemies away from pushing. The player in A Tower can go up to Vents while the support player can watch from A Tower or Ramps. Even a rotation to B is possible within moments.
Even if the push is successful and Defenders are retaking, gaining control of A Tower gives a significant advantage, as teammates can cover or even eliminate enemies on the site, giving other players a chance to push and defuse.
B Site
Compared to the A Site, B is less spacious with tight corners. Therefore, a calculated plan of attack can make all the difference. One of the easiest ways to enter B Site is to rush through B Main, using flashes and smoke to make a way to the site.
After cleaning out enemies in the site, players can perch up on B Heaven as it is a critical vantage point to spot any flanks from Mid and Defender Spawn. Other teammates can take positions that aid in spotting the spike and any rivals trying to defuse it.
Another way of a successful B push is to keep three players on B Main and the other two in Mid. The two players in Mid can swing in together from A Sewers and B Market to take out an enemy watching Mid. Rotation from Vents or A will begin, and the three players on B Main can start pushing while the two in Mid can walk up to B Mail and even Heaven.
As in A site, players can hide post-plant until they spot enemies. Using locations for plant sites can be a significant way of securing the round, as it guarantees a kill every time.
Defending on the B site is quite simple. There are only two routes for the Attackers to use: B Heaven or B Main. Therefore, one player in B Heaven can watch the entire Mid if the opposition plans to enter A from Vents or even rush through B Mail. The player inside the site can play for B Main using the various hiding spots.
Footsteps are audible in plenty of spots, so the player can quickly know if the enemy is planning an attack outside B Main. If a teammate is using an Operator, they can also quick peek at B Main and take out an enemy. Another great option is using Raze’s Paint Shells after giving away half of the bomb site. Either from B Heaven or the Defender side, the enemy will already be in a choke point, and the grenade will do all the work for the team.
All in all, Split is all about teamwork. Execution and quick rotations are vital in making an impact in the round, whether attacking or defending. With the right set of teammates, the game should be easy to win on Split. Utilities are extremely useful in building pressure on the enemy team or taking some pressure off your team. In all situations, communicating with your allies will ensure an enjoyable win on the map.
The Best Agents to Pick on Split
Split is a map that can be an easy game for the team that knows how to build a team. Sure, any player can pick an agent and start getting kills if they don’t want to coordinate with the team. But, a thoughtful and planned win feels better than swinging out and eliminating everyone.
For those that like to out-smart their opponents and take the win easily, here’s a small list of which agents might be the best option for Split:
Reyna
Only a few other agents have as much versatility as Reyna. Described as the killing machine, Reyna can be a menace on the server if the right player chooses to pick her. She has a kit dedicated to ensuring her survival; therefore, Reyna remains one of the best agents to pick on Split.
Almost every team needs a good duelist who can provide the opening kills, and Reyna can be the right agent in the right hands. Reyna can defend any site she wants. She doesn’t have to wait for the smoke to deploy to keep her from taking out the enemies.
Split favors those that like to play fast, and Reyna is one of the best agents in the business for that. Blinding enemies with her flashes and peeking out for information or kills can benefit the team in both situations. Reyna should be the first to enter a site or engagement and lead the team into the game.
Raze
Raze is also an excellent choice for playing Split. As a duelist, Raze can work with her teammates to create choke points and exploit her enemy. Her utility involves working with explosives; therefore, she is excellent at dealing damage to enemies or finishing them off on low health.
Using Raze’s Bot at the beginning of every round can help gather information. Whether the enemy is just at the site’s entry or ready to take a position, her detonating robot becomes extremely useful in providing enemy locations and even hurting them to some extent. Her Paint Shells are the most crucial piece of kit Raze has available. She can kill several enemies at once if the player throws it timely and accurately.
Perhaps what Raze is best known for in Split combines her Blast Packs and Showstopper abilities. Hundreds of clips show Raze flying through the skies with a rocket launcher in her hand, obliterating multiple enemies at once in a single shot. With such a great kit, Raze can be a vital opener or even a support player.
Brimstone
Being the Protocol’s leader in the story, it was essential to give Brimstone a kit that provides use on every map. It’s pretty tricky to consider other such agents as Cypher and Omen a good choice for Split, who can also smoke off certain map areas. But because Brimstone has other great options in his kit, the American agent makes it into the list. Split might be the last map where Brimstone’s kit has multiple benefits for the team.
For example, using his smokes can be dangerous on such a small map. Enemies can quickly shoot through this smoke in the open and use corners. Teammates can damage or get deleted without firing a single shot, leading to chaos.
Other than that, Brimstone is relatively adequate for any team. His Incendiary can hold off enemies from a vital position. The Stim Beacon can help teammates if placed in an open spot. Depending upon the team, the Orbital Strike can also help defend the site before or after a spike plant.
Skye
Skye’s trailblazing abilities are helpful in many situations. She can provide ample cover and relay intel on the enemy through her abilities. Part of her job is to play as support, and she can be an essential team member.
Skye’s healing comes in handy when a teammate peeks at an angle and takes damage. Even when the entire team is running low on health, Skye can come in and fill their health up to stay in the game. Skye’s health regeneration can help the team take impossible fights even if she doesn’t survive the round.
As for intel, Skye can use Trailblazer and her Guiding Light abilities. Her tiger can find the enemy’s location and stun them with a pounce. If they’re stuck in a choke point, it’s an easy kill when the team rushes in. With her Guiding Light hawks, Skye can provide the perfect flashes for a teammate peeking with an Operator through A or B Main. That’s what my team usually does!
Skye can always use her Seekers to learn about the enemy in clutch situations when she has to deal with numerous opponents. It’s a menace to deal with the Seekers following an opponent while trying to remain silent, but Skye gets the information in all cases.
Sova
The Russian agent Sova is also a suitable choice for playing Split. He can use arrows to provide his team with the necessary information before entering a site. Instead of peeking from the wrong angle, Sova can use his abilities to tell his teammates which corners the enemy is holding so that they can clear out sites faster.
Even if Sova is far from the site, he can prove to be a nuisance to the enemy using his Shock Bolts. Many professional and ragged players use these arrows to deal damage to the enemy and throw them off from their objective for an instant. If a player uses them accordingly, he might be able to take the opponent off the task, which could even bring in the round in a tight situation.
Sova’s ultimate ability, however, might be the brightest stroke of genius for Split. The map’s design allows the bomb sites to be adjacent to nearby callouts. That allows Sova to defend a site from planting or a planted spike from enemies in a corner and use Hunter’s Fury to take out opponents jeopardizing his plan. It’s a simple setup that gives Sova a perfect chance to take the win, but that doesn’t leave him safe from a lurker. That’s why teammates are essential for Sova to make his move.
Jett
The duelist that plays with no fear, Jett, is like Reyna in a sense. Her enhanced ability to move around allows her to dodge enemies like none other. Unlike some agents who can sneak inside and surprise their enemy, Jett’s agility allows her to pounce on her opponents head-on.
If paired with Skye’s Guiding Light, Jett can take the chance to infiltrate a site and quickly take out unsuspecting opponents. She can even use her Updraft to get to Heaven or Tower and start a lurk. Her Dash also allows her to take quick peeks with the Operator, secure a kill, and move out of danger instantly. By the time the enemy stabilizes, Jett is already positioned to peek again and take another enemy out.
Jett’s ultimate ability is also an excellent tool when the agent is low on cash. With just five daggers, she can dominate the entire enemy team if the player knows how to aim. Jett’s smoke might not be the best cover for teammates, but it can help Jett run through a site with little to no noise and be an annoying element for the opposition.
Best Weapons for the Map
Split is a map that can be a headache for some if they encounter smurfs. It’s a common occurrence and can happen to anybody! Usually, in a map so boxed, combat can be close-quarter. Therefore, some players use devastating weapons at short range and tilt players to rage.
Therefore, if you’re looking to get kills and not care about the team, you can opt for shotguns like Bucky and Judge. With an assisted flash, you can turn a corner and become the Terminator for the enemy team, taking them out with loud shots from a Judge. You can also use the Spectre or Stinger for this purpose, rattling bullets into the enemy’s body in an instant.
However, if you wish to play like the professionals (and a gentleman), the Vandal and Phantom are the best guns. Other rifles like the Bulldog and Guardian aren’t that helpful as the former are great at almost all ranges and can guarantee headshots from various distances. If you wish to spam smokes, opt for an Ares, Odin, or the Guardian.
The Operator might be the only option for the Hawkeye fans who love to create an impact with a bang. Using the Marshal is advantageous only when the enemy peeks from a distance. It won’t work that great in close-quarters unless you’re great at no-scoping enemies.
So, the best option is to use the Classic or Ghost in the first round. For half-buy rounds, you should go for a Spectre or Judge. The Bulldog, Ares, or Guardian might be the best choice in situations that demand a forced buy. Vandal, Phantom, and the Operator are the best options in a good buy scenario. One should usually avoid Marshal, Bucky, and the Odin (no need to use a Gatling gun on such a small map!)
FAQs
Question: Is Split smaller than Haven?
Answer: Technically, yes and no. Haven is much more compact than Split. The angles are too tight, and one has to clear every corner before planting the spike.
Otherwise, it’s a lost cause. But, Haven also offers three different bomb sites with two different spots opening into a standard Mid, so it is relatively larger than Split area-wise. Split only has two sites, but it has much more space for combat when compared to Haven. So, it is smaller than Haven in terms of dimensions, but more spacious.
Question: Is Yoru a good pick on Split?
Answer: Yes. Yoru can be an excellent pick for Split due to many reasons. As a duelist with three flashes (two in the market and one from his decoy!) Yoru can work his way into the site with just two of his utilities. Even when things do not work out his way, the agent can use his Gatecrash to escape into the other site. There are plenty of ways Yoru can be a good pick for the map, but it also relies heavily on how you plan.
Question: How quickly can you rotate in Split?
Answer: The rotations on Split are quick. They might not be as quick as Bind, which allows portals to get close to the site instantly. With an easily accessible Mid with four different routes to the site, rotations are almost always instant in Split. Many teams survive games because they manage to guard the spike in numbers, thanks to a quick rotation from their teammates.
Split Valorant Guide: Conclusion
In short, Split is one of the most exciting maps to experience in the game. With a good lobby of teammates, you can have a lot of fun in a single match.
It is a compact map in design, but the opportunities and strategies one can build in such a small space are numerous. That makes it one of the most unpredictable maps in the game. Many professional and regular players consider it an A-tier map that made Valorant so enjoyable.
It might not be in the competitive pool right now, but it will always remain a fan favorite in the community. Nobody knows how long the map will remain inactive. It might be back with some new tweaks, but we’ll have to wait and see.
Whatever class of agent you might play, Split requires caution because the enemy might be lurking nearby. It might cost you a round or even the entire game if you’re not looking.
Now, go out there and queue the game until you play Split and decimate your opponents. As Sage would say:
“Once more into battle. I’m not tired. Are you?”
- Sage, Round Start